Expert Tips to Convert Business Logo to SEW File Format
Your business logo is more than just a picture. It represents your brand, your reputation, and the trust your customers place in you. When you put that logo on employee uniforms, caps, or promotional totes, it needs to look perfect. Every stitch matters. But here is the challenge. You cannot just print your logo like you would on paper. Embroidery machines speak a different language. They need stitch files, not image files. If you own a Janome or Elna machine, that means learning how to convert business logo to SEW file format correctly.
The SEW format is the native language for many Janome and Elna embroidery machines . It contains detailed instructions about stitch types, directions, thread colors, and needle paths . Without a properly converted SEW file, your machine will either reject the design or stitch it into a messy, unprofessional mess. Let us walk through expert tips to get this right the first time.
What Makes the SEW Format Special
Before we dive into the how, let us talk about the what. The SEW file format is a specialized embroidery file type used primarily by Janome and Elna machines . Unlike a JPG or PNG that simply shows colors and shapes, a SEW file contains coded instructions that tell your machine exactly how to stitch .
What information does a SEW file actually hold? It stores stitch type data, so the machine knows whether to use satin stitches for borders or fill stitches for large areas. It tracks stitch direction, which affects how light reflects off the finished embroidery. It maps needle movement paths so the machine moves efficiently between stitch areas. And it records color change sequences so you know when to swap threads .
When you look at support documentation from major embroidery software companies, you will see SEW listed alongside other common formats. EQStitch, for example, exports to SEW along with DST, EXP, JEF, and PES . Hatch Embroidery also confirms that SEW is a production file format for Janome, Elna, and Kenmore machines . So you are in good company working with this format.
Tip 1: Start with Clean, Vector Artwork
Every professional digitizer will tell you the same thing. Your final embroidery quality depends on your starting artwork. You cannot stitch garbage and expect gold.
Begin with a clean, high-resolution version of your logo. Vector formats like AI, EPS, or SVG work best because they scale infinitely without losing quality . If you only have a JPG or PNG, make sure it is sharp with good contrast. Remove any backgrounds, shadows, or gradients that will confuse the digitizing process . Simplify fine details that are too small to stitch clearly. Text smaller than a quarter inch often turns into unreadable blobs, so consider enlarging those elements.
Professional digitizers spend time at this stage because they know it saves headaches later. Clean artwork means cleaner stitch paths and better results.
Tip 2: Use Professional Digitizing Software
If you plan to convert logos yourself, you need the right tools. Professional embroidery digitizing software gives you control over every stitch parameter.
Wilcom Embroidery Studio is the industry standard. It supports converting designs to and from SEW format along with many other machine file types . The software allows batch conversion, so you can process multiple designs at once.
Hatch by Wilcom offers a more accessible entry point while maintaining professional quality. According to Hatch documentation, it reads and writes SEW production files for Janome, Elna, and Kenmore machines .
SewWhat-Pro is another solid option. This embroidery file editor and conversion tool lets you view, edit, and convert sewing files between formats. It handles batch conversion and includes tools for cutting, density adjustment, and resizing at constant stitch density . The software costs around $65, making it more affordable than full digitizing suites while still giving you professional control.
These programs allow you to import your logo, manually assign stitch types, adjust densities, set underlay, and export as SEW. But they require learning. Expect a curve as you master stitch angles, pull compensation, and fabric behavior.
Tip 3: Understand Stitch Types and Settings
When you open your logo in digitizing software, you will need to assign stitch types to different areas. This is where art meets engineering.
Large filled areas need fill stitches, sometimes called tatami stitches. These create coverage without becoming too dense. Borders, text, and thin elements work best with satin stitches, which create smooth, raised edges that catch light nicely. Fine details and outlines often require run stitches for precision .
Stitch density matters enormously. Set it too high, and the fabric puckers while threads break constantly. Set it too low, and you see backing through the design . The right density depends on your fabric type. Dense fabrics like denim handle higher density than loose knits. Professional digitizers adjust density based on the specific material you plan to use.
Underlay stitches are the hidden foundation of good embroidery. These stitches go down first, stabilizing the fabric before the top stitches appear . Without proper underlay, designs shift during stitching. Edges misalign. Fills pucker. Apply underlay to every element that needs stability.
Pull compensation accounts for fabric distortion. When you stitch into fabric, the thread tension pulls the material together. Pull compensation widens certain areas ahead of time so they end up the correct size after stitching . This step separates professional files from amateur attempts.
Tip 4: Match Colors Carefully
Thread colors in a SEW file are not automatic. You need to assign them based on your logo and the thread brands you use.
Different thread brands have different color numbers and shades. A 50-weight polyester thread from Madeira looks slightly different than the same number from Robison-Anton. Professional digitizers keep thread color charts handy and select the closest matches to your logo colors .
The stitching sequence also matters. Arrange your colors to minimize thread changes and machine head jumps. Group same colors together. Plan the order so the machine stitches efficiently without unnecessary trims . Good sequencing saves production time and reduces thread waste.
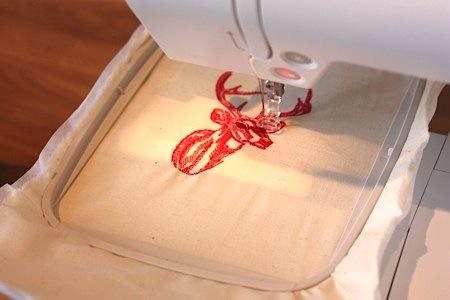
Tip 5: Test Before You Trust
Here is the golden rule of embroidery. Never skip the test stitch.
Even professional digitizers test every design before sending it to a client. They run the file on scrap fabric matching the final material. They watch for thread breaks, puckering, misalignment, or gaps in coverage .
If you are converting logos yourself, you must do the same. Load your SEW file, grab fabric similar to your final project, and stitch it out. Watch the entire process. Look for problems. If you see issues, go back to your editable file and fix them. Adjust density, compensation, or underlay as needed. Test again until the design stitches perfectly.
Skipping this step leads to ruined garments and wasted thread. Test stitches are cheap insurance.
Tip 6: Consider Professional Digitizing Services
Here is an honest truth that many embroiderers learn the hard way. Converting business logos to SEW format is harder than it looks. Professional digitizers spend years mastering stitch angles, fabric behavior, and machine dynamics .
When you hire a service like Absolute Digitizing, you get experienced digitizers who understand Janome and Elna machines. They analyze your logo, choose appropriate stitch types, set correct densities, and export a production-ready SEW file. Turnaround is fast, often within hours. Prices start around $10 per design .
Fiverr also hosts freelance digitizers who can convert your design to SEW format. One Level 2 seller with seven years of experience offers unlimited revisions and delivers files within one day for around $10 . Reviews show consistently positive feedback, with clients praising quick turnaround and quality work.
Outsourcing saves you from buying expensive software, spending weeks learning digitizing, and ruining garments with bad files. For business owners who need consistent, professional results, this is often the smartest choice.
Common Mistakes When Converting Logos Yourself
Let us look at what typically goes wrong when people try DIY logo conversion.
Relying on auto-digitizing software is the biggest trap. These programs randomly assign stitches without understanding texture, direction, or fabric type . The result is usually a messy, unbalanced design that looks nothing like your logo.
Ignoring stitch density causes constant problems. Too dense means puckering and thread breaks. Too loose means thin, transparent embroidery .
Scaling a digitized design without adjusting stitches distorts everything. Text shrinks too much. Elements lose proportion. Each size needs recalibration of stitch types and densities .
Skipping underlay or pull compensation leads to shifting, sinking stitches, and uneven outlines .
And of course, failing to test sew-outs guarantees expensive surprises when you stitch final products .
The Professional Conversion Process
When you understand how professionals work, you appreciate what goes into a good SEW file.
Step one is logo preparation. Clean artwork, vector format, simplified details .
Step two is importing into professional software like Wilcom Embroidery Studio .
Step three is manually assigning stitch types to every element. Fill stitches for large areas. Satin stitches for borders and text. Run stitches for fine details .
Step four is adjusting colors and sequencing. Match thread colors. Set the stitching order for efficiency .
Step five is exporting as SEW format, plus other formats like DST or PES for flexibility .
Throughout this process, the digitizer applies underlay, sets pull compensation, and adjusts density based on your fabric. The result is a file that stitches cleanly every time.
Which Path Is Right for You?
You have three main options for converting your business logo to SEW format.
First, buy professional software and learn to digitize yourself. This gives you long-term control but requires significant time investment. SewWhat-Pro offers an affordable entry point at $65 . Full suites like Wilcom cost more but provide deeper features .
Second, use free tools like Ink/Stitch with Inkscape. This costs nothing but demands technical knowledge and manual effort. Results vary based on your skill level.
Third, hire a professional digitizing service. For $10-15 per design, you get expert results without learning curve or software costs . Services provide unlimited edits, fast turnaround, and guaranteed quality.
For most business owners, option three makes the most sense. Your time is valuable. Your brand consistency matters. Paying a small fee for guaranteed results beats wasting hours on trial and error.
Conclusion
Converting a business logo to SEW format is not a simple file save. It is a skilled process that transforms visual artwork into precise machine instructions. The SEW file must contain correct stitch types, densities, underlay, pull compensation, and color sequences to stitch properly on your Janome or Elna machine.
You can learn this craft yourself with software like SewWhat-Pro or Wilcom. You can experiment with free tools like Ink/Stitch. Or you can hire professionals who do this every day and deliver perfect files for a small fee.
Whichever path you choose, remember the fundamentals. Start with clean artwork. Understand stitch settings. Test before production. And never compromise on quality. Your logo represents your business. It deserves to look its best in every stitch.