Easy Way to Transform JPG Images into VP3 Stitch Files
Embroidery is more than thread and fabric. It starts with a digital file. If the file is not right, the design will not stitch well. Many people have a JPG image and want to use it on their machine. But a JPG file cannot run on an embroidery machine.
That is why many people search for ways to Convert JPG to VP3 so their design can work on Husqvarna Viking and other VP3-based machines. A JPG is only a picture. A VP3 file is a stitch file. The machine reads stitch points, not pixels. So the image must be changed into stitch data first.
I have worked in embroidery digitizing for many years. I have seen what works and what fails. I have tested designs on caps, shirts, jackets, and bags. In this guide, I will explain the full process in a simple way. No hard words. No tech talk. Just clear steps.
What is a JPG file?
A JPG file is a photo file.
It is made of tiny dots called pixels.
Phones and cameras use JPG.
It is good for:
-
Social media
-
Websites
-
Photo print
But it is not made for embroidery machines.
If you load a JPG into a machine, it will not run. The machine does not understand pixels.
What is a VP3 file?
A VP3 file is a stitch file.
It is used by Husqvarna Viking and some other machines.
This file holds:
-
Stitch path
-
Thread color
-
Speed data
-
Stop points
It tells the needle where to go.
It is like a road map for the machine.
Without this file, your design cannot stitch.
Why You Cannot Just Rename the File
Some people try to rename “design.jpg” to “design.vp3”.
This does not work.
The file is still a photo inside.
The machine needs stitch data.
To change a JPG into VP3, you must digitize it.
What Is Digitizing?
Digitizing is the process of turning art into stitches.
It is not the same as graphic design.
It is not just tracing lines.
It means planning:
-
Stitch type
-
Stitch angle
-
Density
-
Underlay
-
Path order
I have digitized thousands of designs. I can tell you this: good digitizing makes all the difference.
Step-by-Step: How to Turn a JPG into a VP3 Stitch File
Let us break it down into simple steps.
Step 1: Choose a Clear JPG Image
Start with a high-quality image.
Make sure it is:
-
Not blurry
-
Not too small
-
Clear in color
Simple logos work best.
Photos with too much detail are harder.
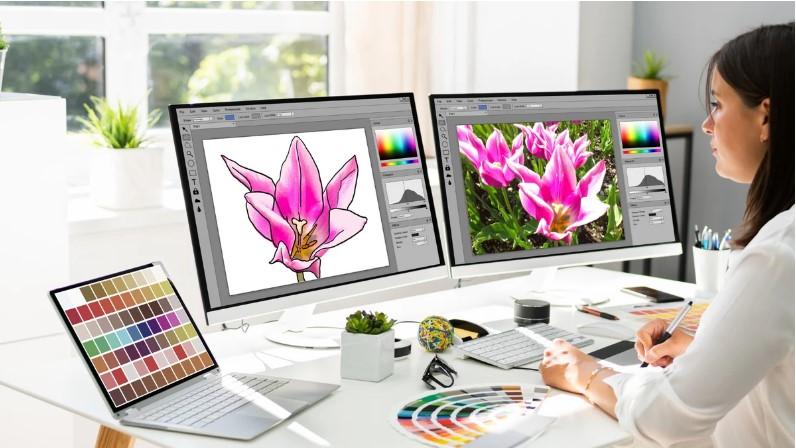
Step 2: Open the Image in Digitizing Software
You need embroidery digitizing software.
Examples include:
-
Hatch
-
Wilcom
-
Embrilliance
Open your JPG inside the software.
Place it on the workspace.
Step 3: Resize Before Digitizing
Set the final size first.
Do not digitize at a small size and then stretch it big later.
Large size changes can break stitch quality.
Choose the correct size based on:
-
Shirt chest
-
Cap front
-
Sleeve area
Size matters in embroidery.
Step 4: Choose Stitch Types
Now the real work begins.
You must choose the right stitch type for each part.
Run Stitch
Used for thin lines.
Good for detail.
Satin Stitch
Used for text and borders.
Best for small logos.
Fill Stitch
Used for big areas.
Covers space with pattern stitches.
Each area of your JPG must be planned.
Step 5: Set Stitch Direction
Stitch angle affects shine and look.
Wrong angle can cause fabric pull.
Good angle makes design smooth.
For example:
-
Letters need clean direction
-
Large fills need balanced angles
I always test angles before final save.
Step 6: Add Underlay
Underlay is a base stitch.
It sits under the top stitch.
It helps hold fabric in place.
Without underlay, fabric may pucker.
This step is very important.
Many beginners skip it.
Do not skip it.
Step 7: Adjust Density
Density means how close the stitches are.
Too high density:
-
Makes fabric stiff
-
Breaks thread
Too low density:
-
Shows gaps
-
Looks weak
Each fabric needs a different setting.
Cotton is not the same as denim.
Caps are not the same as polos.
I always ask about fabric before finalizing a file.
Step 8: Check Path Order
Path order means stitch sequence.
Good order saves time.
Bad order causes trims and jumps.
Clean path gives smooth run.
It also reduces thread waste.
Step 9: Test the Design
Before saving as VP3, test it.
Most software has a stitch preview.
Watch the design run.
Check for:
-
Long jumps
-
Overlap
-
Gaps
Fix errors now.
Do not wait until fabric is wasted.
Step 10: Save as VP3
Now export the design.
Choose VP3 format.
Save the file.
Load it into your machine.
Do a sample stitch.
Never skip the test stitch.
Common Problems When Changing JPG to VP3
I have seen many common issues.
Here are some of them.
Problem 1: Too Much Detail
Photos have too many shades.
Embroidery cannot copy every pixel.
Solution: Simplify the design.
Remove small details.
Problem 2: Small Text
Tiny text may not stitch well.
Letters under 5 mm can break.
Solution: Increase text size or use satin stitch carefully.
Problem 3: Fabric Puckering
This happens when density is too high.
Or when no underlay is used.
Solution: Adjust density and tension.
Problem 4: Thread Breaks
Caused by tight stitches.
Or sharp angles.
Solution: Smooth curves and reduce density.
Why Professional Digitizing Is Better
You can use auto-digitizing tools.
But auto tools are not perfect.
They often:
-
Add too many stitches
-
Miss small areas
-
Create messy paths
Manual digitizing gives better control.
At Embroidery Digitizing Services in USA - Digitizing Buddy, we create stitch files by hand. We test them. We adjust them based on fabric type. That real testing builds trust with our clients.
We do not just press auto-convert.
We study each design.
Real Experience from the Field
I once worked on a logo for caps.
The client provided a small JPG file.
The first auto file had 25,000 stitches.
It was too dense.
The cap wrinkled.
I rebuilt the design.
Reduced stitch count to 16,000.
Adjusted angles.
Added proper underlay.
The final result was clean and smooth.
This is why skill matters.
Tips for Best Results
Here are simple tips you can follow:
Keep Design Simple
Flat logos work best.
Avoid heavy shadows.
Use Bold Shapes
Thin lines can break.
Thicker shapes stitch better.
Match Design to Fabric
Tell your digitizer about fabric.
It changes settings.
Always Do a Test Stitch
Even the best file needs testing.
Test on scrap fabric first.
When Should You Hire a Digitizing Service?
You should hire a pro when:
-
The design is complex
-
It is for business use
-
You need bulk production
-
You want perfect results
Embroidery Digitizing Services in USA - Digitizing Buddy helps clients with logo digitizing, cap files, jacket backs, and more. We focus on clean stitch paths and balanced density.
Quality work builds long-term trust.
Cost of Converting JPG into VP3
Cost depends on:
-
You
-
Detail
-
Stitch count
-
Turn time
Simple logos cost less.
Big jacket designs cost more.
Cheap files may look bad.
Quality files save money in the long run.
Final Thoughts
Turning a JPG image into a VP3 stitch file is not just file change. It is a full digitizing process.
You must:
-
Study the art
-
Plan stitch types
-
Adjust density
-
Add underlay
-
Test the design
A VP3 file is a stitch map.
A JPG is just a picture.
If you want clean embroidery, focus on quality digitizing.
From my years of hands-on work, I can say this with confidence: strong stitch files create strong results.
Take your time.
Test your design.
And always choose quality over quick fixes.